Saturday, February 27, 2021

Ink-Stamp-Share-February Blog Hop-Fancy Fold Cards

Ink-Stamp-Share-February Blog Hop-Fancy Fold Cards

I love fancy fold cards and you have hopped from Rochelle, her card was awesome. I love being a part of this group, such talented stampers.

My favorite set from the Jan-June mini catalog is the Ice Cream Corner suite.

I made this card some time ago and said I would do a video on how to make it, finally here it is. I'm not sure what this fold is called, I'm going to call it the Cascade card.


The fun thing about this card, you can make it any size you want. And it has a pocket for a gift card, I love giving and getting gift cards.


I hope you enjoy the video and if you have any questions, please leave me a comment and I'll get back to you.


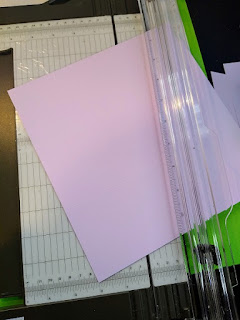
Step 1: Cut cardstock 8 1/2 x 9

Step 2: Score at 3 and 6 inches
Step 3: Cut cardstock at an angle.
I lined the bottom point up at the 2 inch mark and the top corner at the 5 1/2 inch mark. Make sure your score lines are to the side of the trimmer and not the top of the trimmer.

Step 4: Cut your cardstock: You now have to card bases.


Step 5: Fold and score your card bases.


For the Gift card holder score a piece of Designer Series Paper 2 1/2 x 3 3/4 score at 1/2 inch on 3 sides to make the pocket to hold the gift card.


Cut the two sqares as shown in the picture at an angle. This makes the pocket to hold your gift card.


On the left hand side of this blog you will see the words Follow by Email, click on the link and sign up. You will get notified by email when there is a new blog post. If you are seeing the blog on your smartphone you have to scroll all the way the the bottom and click on web view then you can see the link and any videos I have posted. Not sure why that is but it's technology, gotta love it. I will be giving away 2 of this stamp set if you sign up and comment at the bottom of this blog.


Up next is Deb, you can bet she will have an awesome card. Click the next button and if you get lost click on the links in the roll call.

Friday, February 26, 2021

Cut and Emboss Machine Tip for the Day

 I love the new Cut and Emboss machine from Stampin Up and I have a fun tip for you today. If you are looking for a new machine let me share some information with you. Watch the video for my tip for the day. I will be sharing more tips to make your die cutting more fun.


SO MUCH TO LOVE!

So what sets our machines apart from the rest? Here are some of our favorite features:

  • Durable machines with high-quality results. The solid steel construction frame and rubber feet that securely grip the work surface produce crisp, clean, precise cutting and beautifully detailed embossing.
  • Easy to use. The machines and tools are designed for an intuitive die-cutting and embossing experience. For example, all plates are labeled with a number and are color coded for easy reference and use when building your sandwich. And just like the name suggests, our Magnetic Cutting Plates have fully-magnetic surfaces to make it easy to securely position your dies and keep them in place.
  • Simple to store. The platforms on both machines fold for space-saving storage and they look pretty too–the sleek, clean design suits any crafting space.
  • Portable. You can use both machines at home or on the go with their folding platforms and ergonomic carrying handles. This makes it easy to showcase the product line in your classes and workshops! It’s also convenient for your customers who like to attend crops or other crafting get togethers.
  • Link to my webstore with host code
  • Product List
  • Don't forget to come back tomorrow for the Fun Fold Blog Hop with Ink-Stamp-Share. There will be so many great projects.


Friday, February 19, 2021

How to make your own Pearlized Paper using shimmer paint

Techniques are so much fun, and I saw a video on YouTube by Linda from Stamp school. 
She made pearlized paper using shimmer paint, I was hooked, here is my version.

 I love techniques and this 
one is great, so simple but what a WOW when you are finished.
I used frost white shimmer
paint, the new blender brushes and the 3D Seashells embossing folder from the Sand and Sea suite.
You can make any color you like. I made Soft Seafoam, Petal Pink, Sahara Sand and this Seaside Spray. Don't you love all the colors that remind you of the sea.
You can watch my video and then create your own, caution this is addictive.
I will be giving away a stamp set or 1 blender brush if you sign up for my YouTube channel or leave me a comment on YouTube if you have signed up all ready. You can also leave me a comment on this post for a chance to win. I will need your email to let you know if you have won.

Punch Party Stamp Set                                                             Blender Brush


Saturday, February 13, 2021

Ink.Stamp.Share-February Showcase

 Ink.Stamp.Share-February Showcase


So glad you could join us today, I'm sure Tracy had a wonderful project to share with you. 

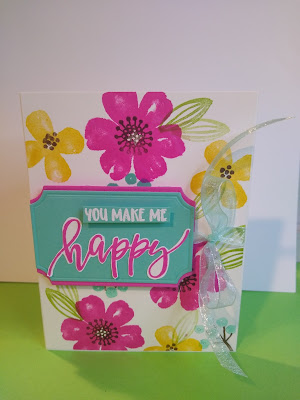
I have been playing with the Pretty Perennials bundle, I loved the sample in the mini catalog. I looked the colors up on our demonstrator website and I changed them up a little, as I was in the mood for something really bright. What do you think are you a fan of subltle or bright?

Magenta Madness, Coastal Cabana, Granny Apple Green, Early Espresso and Crushed Curry, than a little Pool Party with the ribbon. I think this would make a really sweet gift for someone. I know a lot of people that I could give it to.


Who wouldn't like a little candy with their gift, I am a fan of Peppermint Patties and the color is a perfect match for Magenta Madness.


Up next is the video to make the card, hope you like it. If you would please subscribe to my YouTube channel.


Click on the Next button to go to Laura Mackie, if you get lost just click on the names below.


Product List

Monday, February 8, 2021

You Are Amazing Project Kit Stepped Up


This is the You Are Amazing Project kit in the new Jan-June mini catalog. It's a really great kit if you need cards in a hurry but if you want to play this is a great way to start. With this kit you can make 16 cards, but if you want to play you can make even more. You can cut the card bases in half and then just add thick whisper white card bases and you can make as many as 32. Keep on reading and watch the video to see what I have made so far.


These are the pieces from the kit


Cutting your card bases in half gives you more cards or use the pieces to cut die shapes that match your project exactlly. Sometimes the kit pieces have a different texture than our card stock.


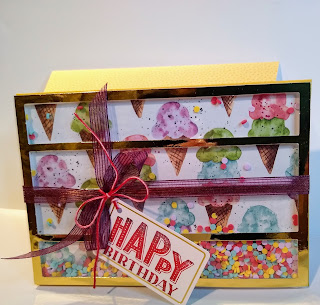
After punching out the long skinny gold rectangles I was left with this border. It was just calling out to be made into a shaker card. You would never know this is something you usually throw away. It was a good size piece  4x6, I had to use one of the bases from the Flowers for Every Season memories and more cards and envelopes.


This next card is so Happy and I had to make an envelope to match it.


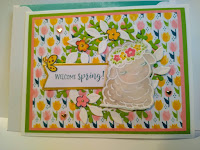
Of course I had to make a couple of Easter/Spring cards, love the tulip background..

I love the stripe background and then I used the Fine Art Floral Gold Acetate for an overlay. I love how it matches the gold heart border.


Finally I have a video to share some of my thoughts about this kit. If you haven't subscribed to my YouTube channel yet, please do. Click to Subscribe